Customize Your Cookie Dough Truffles: Pro Tips & Flavor Swaps
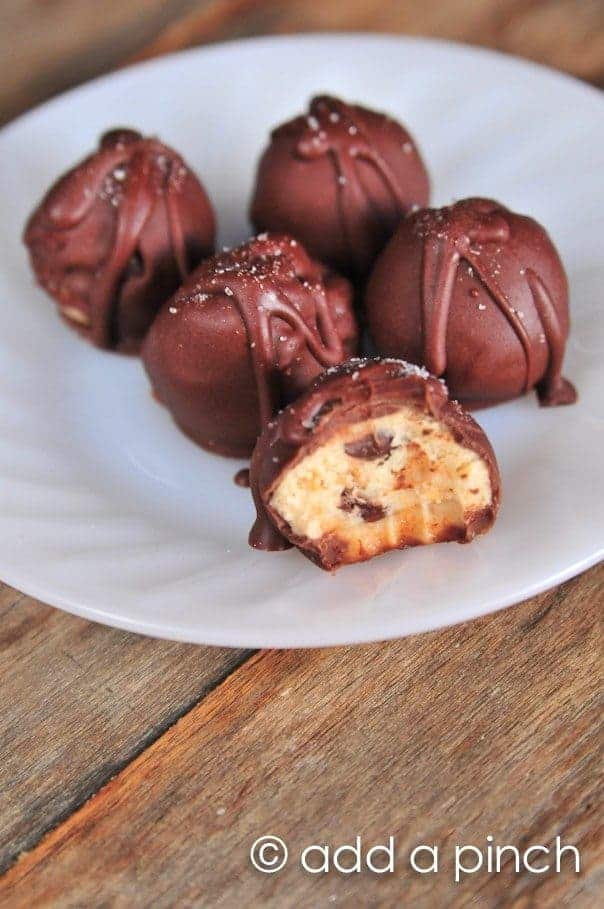
Imagine sinking your teeth into a rich, velvety chocolate shell, only to discover a soft, creamy center bursting with the irresistible, nostalgic taste of classic cookie dough. That's the magic of homemade cookie dough truffles – an ultimate no-bake treat that's as delightful to create as it is to devour. While the basic recipe for these bite-sized indulgences is inherently amazing, the real fun begins when you start to personalize them. Get ready to elevate your dessert game from simply delicious to uniquely yours by mastering
the perfect cookie dough truffles recipe and then making it truly your own.
These easy-to-make treats evoke the joyful memory of sneaking a spoonful of raw cookie dough, but with the added safety of no eggs and the elegance of a chocolate coating. They're perfect for parties, thoughtful gifts, or simply satisfying that sweet craving anytime. But why stop at the classic? We're about to dive deep into pro tips and a world of flavor swaps that will transform your truffles into show-stopping, personalized masterpieces.
Crafting the Perfect Cookie Dough Truffles Recipe: The Essential Foundation
Before we unleash our creativity with flavor explorations, it's crucial to understand the bedrock of
the perfect cookie dough truffles recipe. This foundation ensures a consistently creamy center and a delightful texture that holds up beautifully. The beauty of this recipe lies in its simplicity and the fact that it's entirely no-bake, making it accessible for bakers of all skill levels.
The core components typically include butter, granulated sugar, brown sugar, vanilla extract, milk (or heavy cream), all-purpose flour, and mini chocolate chips. It's the harmonious blend of these ingredients that creates that iconic chocolate chip cookie dough flavor.
However, there are two non-negotiable elements for truly perfect and safe cookie dough truffles:
*
Heat-Treated Flour: Since these are no-bake, it's vital to eliminate any potential bacteria in raw flour. This step is quick and easy! You can heat treat your flour in the microwave by heating it on high in a microwave-safe bowl for 30-second intervals, stirring after each, until it reaches 160°F (71°C). Alternatively, spread it on a baking sheet and bake at 300°F (150°C) for about 5-7 minutes, stirring halfway. Let it cool completely before using. You can even heat treat extra flour to store for future no-bake projects!
*
Mini Chocolate Chips: While standard chocolate chips are great for cookies, they are simply too large for truffles. Mini chocolate chips are a must. They distribute evenly throughout the dough, providing a consistent chocolatey burst in every bite without disrupting the truffle's compact, smooth texture. Using regular chips would make rolling difficult and the truffles prone to crumbling.
Once you have your heat-treated flour and mini chocolate chips ready, mixing the dough is straightforward: cream together the butter and sugars, beat in the vanilla and milk, then gradually incorporate the flour until just combined. Fold in your mini chocolate chips, and your base dough is ready for chilling – a critical step for ease of handling and optimal texture.
Elevate Your Truffles: Essential Pro Tips for Success
Beyond the ingredients, technique plays a significant role in achieving truly remarkable cookie dough truffles. Following these expert tips will ensure smooth rolling, flawless coating, and an impressive final product every time. For a deeper dive into the step-by-step process, check out our guide on
Perfect Cookie Dough Truffles: 7 Steps to No-Bake Dessert.
- Chill Your Dough Thoroughly: Patience is a virtue here. After mixing, cover your cookie dough and refrigerate it for at least 30 minutes to an hour. This firms up the dough, making it much easier to roll into perfect spheres without sticking to your hands. A well-chilled dough is the secret to uniform, shapely truffles.
- Portion for Consistency: Use a small cookie scoop (about 1 tablespoon) to portion out the dough. This ensures all your truffles are roughly the same size, leading to even chilling and a professional appearance.
- Roll Firmly and Smoothly: Once portioned, roll the dough firmly between your palms to create dense, smooth balls. Any cracks or unevenness will show through the chocolate coating.
- Second Chill Before Coating: After rolling your dough balls, place them back in the refrigerator (or even the freezer for 10-15 minutes) for another quick chill. This hardening prevents them from melting or losing their shape when dipped into warm chocolate.
- Mastering the Chocolate Coating:
- Choose Quality Chocolate: Good quality melting wafers, chocolate chips, or finely chopped chocolate bars will give you the best results for a smooth, glossy coating. Candy melts are also an excellent option for vibrant colors or specific flavors.
- Melt Gently: Use a double boiler or microwave in short bursts (30 seconds at a time, stirring well after each) to melt your chocolate. Overheating will cause it to seize or become grainy.
- The Dipping Technique: Drop one chilled truffle into the melted chocolate. Use a fork or a special dipping tool to gently lift it out. Tap the fork against the side of the bowl to allow excess chocolate to drip off. This creates a thin, even coat.
- Work Quickly: Place the coated truffle onto a parchment-lined baking sheet. If you're adding toppings, do so immediately before the chocolate sets.
- Work in Batches: If you're making a large batch, keep the un-rolled or un-dipped dough/truffles chilled while you work. This maintains their firm consistency.
Unleash Your Creativity: Flavor Swaps & Customization Ideas
Now for the exciting part – transforming your classic cookie dough truffles into bespoke creations! The versatility of
the perfect cookie dough truffles recipe makes it a fantastic canvas for endless flavor combinations.
Texture Transformations
- Crunchy Nuts: Mix in finely chopped walnuts, pecans, almonds, or peanuts for a delightful textural contrast. For an even deeper flavor, lightly toast the nuts before adding them to the dough.
- Salty Crunch: Crush some pretzels and fold them into the dough for a unique salty-sweet experience.
- Crispy Treats: Add a handful of crisp rice cereal for a lighter, airy crunch reminiscent of a classic chocolate bar.
- Chewy Oats: A small amount of finely ground rolled oats can add a comforting chewiness and a slightly heartier feel.
Aromatic Adventures: Extract Swaps
Vanilla extract is classic, but other extracts can completely redefine your truffles.
- Almond Extract: For a sophisticated, nutty undertone.
- Peppermint Extract: Perfect for a festive, mint chocolate chip vibe, especially around the holidays.
- Orange or Lemon Extract: For a bright, citrusy zing that pairs wonderfully with chocolate.
- Maple or Rum Extract: To add warmth and depth, great for autumn or adult-themed treats.
Chocolatey Variations
Don't limit yourself to milk chocolate chips and a plain chocolate coating!
- Dough Mix-ins: Substitute or combine mini chocolate chips with white chocolate chips, dark chocolate chips, peanut butter chips, butterscotch chips, or even mini M&M's.
- Coating Options: Use dark chocolate for a more intense flavor, white chocolate for a creamy, sweet contrast, or experiment with colorful candy melts for themed parties. Drizzle contrasting melted chocolate over the set truffles for an elegant finish.
Festive Flair & Toppings
These external additions are where you can really make your truffles visually pop!
- Sprinkles Galore: Roll your truffles in colorful sprinkles, jimmies, nonpareils, or holiday-themed sprinkles immediately after coating for a festive touch.
- Crushed Candies: Roll them in crushed peppermint candy canes, crumbled Oreo cookies, or graham cracker crumbs for added flavor and texture.
- Coconut Kiss: Toast shredded coconut for a nutty flavor, or use untoasted for a softer chew, then roll the coated truffles in it.
- Powdered Elegance: A simple dusting of powdered sugar or cocoa powder can give your truffles a refined, sophisticated look.
Unexpected Additions
For the truly adventurous, consider these less common but equally delicious twists:
- Spiced Delights: A pinch of cinnamon, nutmeg, or even a tiny amount of chili powder (for a Mexican hot chocolate kick) can add incredible complexity.
- Coffee Boost: A teaspoon of espresso powder mixed into the dough can deepen the chocolate flavor and add a subtle coffee note.
- Zesty Brightness: Finely grated lemon or orange zest can cut through the sweetness and add a fresh, aromatic lift.
- Nut Butter Swirl: Swirl a tablespoon of melted peanut butter, almond butter, or Biscoff spread into a portion of the dough for a rich, creamy variation.
Serving, Storing, and Sharing Your Customized Creations
Once your customized cookie dough truffles are set, presentation can make them even more special. Arrange them in mini cupcake liners for an elegant display. If gifting, place them in decorative boxes, perhaps with a custom label detailing their unique flavor profile.
Store your finished truffles in an airtight container in the refrigerator. They will keep beautifully for up to a week. For longer storage, you can freeze them for up to a month. Just be sure to thaw them in the fridge before serving. These customized treats are perfect for any occasion – from casual gatherings and holiday platters to thoughtful hostess gifts and a personal indulgence after a long day.
Conclusion
From the moment you whip up
the perfect cookie dough truffles recipe, you're embarking on a journey of nostalgic flavors and creative expression. These delightful no-bake treats are incredibly versatile, offering a canvas for countless customizations. Whether you prefer a classic rendition with mini chocolate chips or want to venture into bold new flavor territories with extracts, nuts, and exotic toppings, the power to create a truly unique indulgence is in your hands. So, gather your ingredients, unleash your imagination, and get ready to impress everyone (including yourself!) with your bespoke, bite-sized bliss. Happy rolling, dipping, and most importantly, happy tasting!